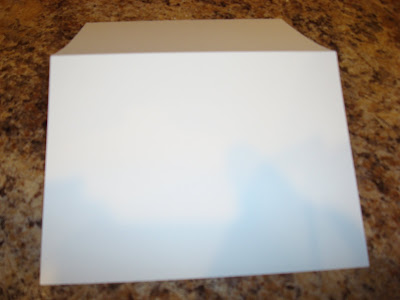
plain white card stock...
into this...
a set of homemade cards ready to give for Christmas!
You will need the following materials:
a plastic shoe bin
pre folded card stock
envelopes
oil paint (the kind you would use on model cars)
toothpicks
popsicle sticks (or something to stir with)
plastic or newspaper
First protect your work space by laying down plastic or newspaper.
Next fill the plastic shoe bin half full of water.
With a toothpick drop several drops of oil paint onto the water.
repeat using as many colors as desired.
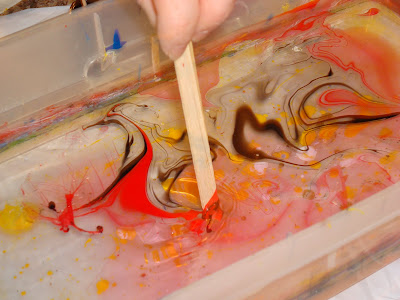
With a popsicle stick stir the paint to create "groovy" designs.
Lay your card, one folded side down, onto the top of the water.
After they dry completely
I gather them up and put them into folded position
and put them underneath a heavy object or book.
This allows them to lay flat in a folded position.
When it comes time to package
I choose about 6 cards and combine them with 6 envelopes.
You can "wrap" them in any way you want...
use ribbon,
put them in a pretty box,
or I use wire, buttons and beads.
The possibilities are endless!
This is a very easy project to do with kids as well.
In fact, my daughter loves this project and
did enough cards to give to each of each
her teachers this year for Christmas.
As a tip... if you have plastic gloves, wear them!
Same goes for a smock to cover good clothes!
I am posting this at
Between Naps on the Porch for Metamorphosis Monday
Big thank you to Susan for being such a wonderful hostess.
and at
a Soft Place to Land for DYI Day.
Big thank you to Kimba as well!
Thank you for visiting today!
Lay your card, one folded side down, onto the top of the water.
When you lift the card, you will get something like this!
or this!
Lay them flat to dry.After they dry completely
I gather them up and put them into folded position
and put them underneath a heavy object or book.
This allows them to lay flat in a folded position.
When it comes time to package
I choose about 6 cards and combine them with 6 envelopes.
You can "wrap" them in any way you want...
use ribbon,
put them in a pretty box,
or I use wire, buttons and beads.
The possibilities are endless!
This is a very easy project to do with kids as well.
In fact, my daughter loves this project and
did enough cards to give to each of each
her teachers this year for Christmas.
As a tip... if you have plastic gloves, wear them!
Same goes for a smock to cover good clothes!
Between Naps on the Porch for Metamorphosis Monday
Big thank you to Susan for being such a wonderful hostess.
and at
a Soft Place to Land for DYI Day.
Big thank you to Kimba as well!
Thank you for visiting today!


10 comments:
Yours turned out so beautifully! You have no idea how awful I am with arts and crafts. Mine would all be that ugly purple/brown that happens when you mix the wrong colors and I would probably be covered head to toe in paint. I can do food, flowers even furniture...but, give me anything more than a crayon and I'm in trouble. Sue
How fun is this! These would make great gifts for the teachers (or several other people on my list). Great idea.
Jane
What a "groovy" idea! This would make nice "framed" art too. I can't wait to share this with my 11yo "craft" buddy. ~Lisa
They turned out great. While yours look great, I have to say Martha Stewart has issued a warrant for me if I touch a glue gun, paint or a stamp! LOL They are nice though
Gorgeous--good job and color combos---the KEY!! WELL done!
Stop on by!
love, kelee
I am always SO amazed by the creativity of the women that blog. They sew and paint and decorate and bake and the list goes on and on and LOOK at what you do! :) So unique! I must show these to my daughter. Beautiful!
Very cute project! That would be a lot of fun to do with my kids when they get older.
When you add the "bling", those cards just POP!!
Wow, those are amazing!
I love these cards. What a great gift idea!
Wonderful, wonderful, wonderful idea. I can visualize doing fabric like this too!
Post a Comment