
Step by step we have been putting the Provision back together!
I debated on how much of the upstairs to share,
and decided to go all out and share it all
from where we started to where we are today!
For those joining me for the first time
from Between Naps On the Porch....
First ~ Welcome
Second~ to catch you up to date

My husband and I bought this house
at the beginning of the year
and have spent the past 8+ months
gutting it and putting it all back together.
We were so excited this week to FINALLY
have the upstairs ready for carpet!
However to really appreciate the change
it helps to go back and see just where we started
and how far we have come!
Zac's Room
(my son)

This is what the room looked like
when we first saw the house.
This window faces the front of the house.
Turning around you could see the
window facing out of the back of the house!

In order to make it a real bedroom...

we added a wall to divide the bedroom from the hall.

While we took down most interior walls and
ceilings in the house,
we decided to leave the original walls and ceilings
in this room.... opting for a fresh paint job and trim
to bring the room up to par.

Like the bathroom fixtures?????

After window trim and base boards were installed,
I painted the room this warm gray/ purple color (Zac's choice).

And here is the room with carpet!
I've never been so happy to say goodbye
to the old asphalt tiles!
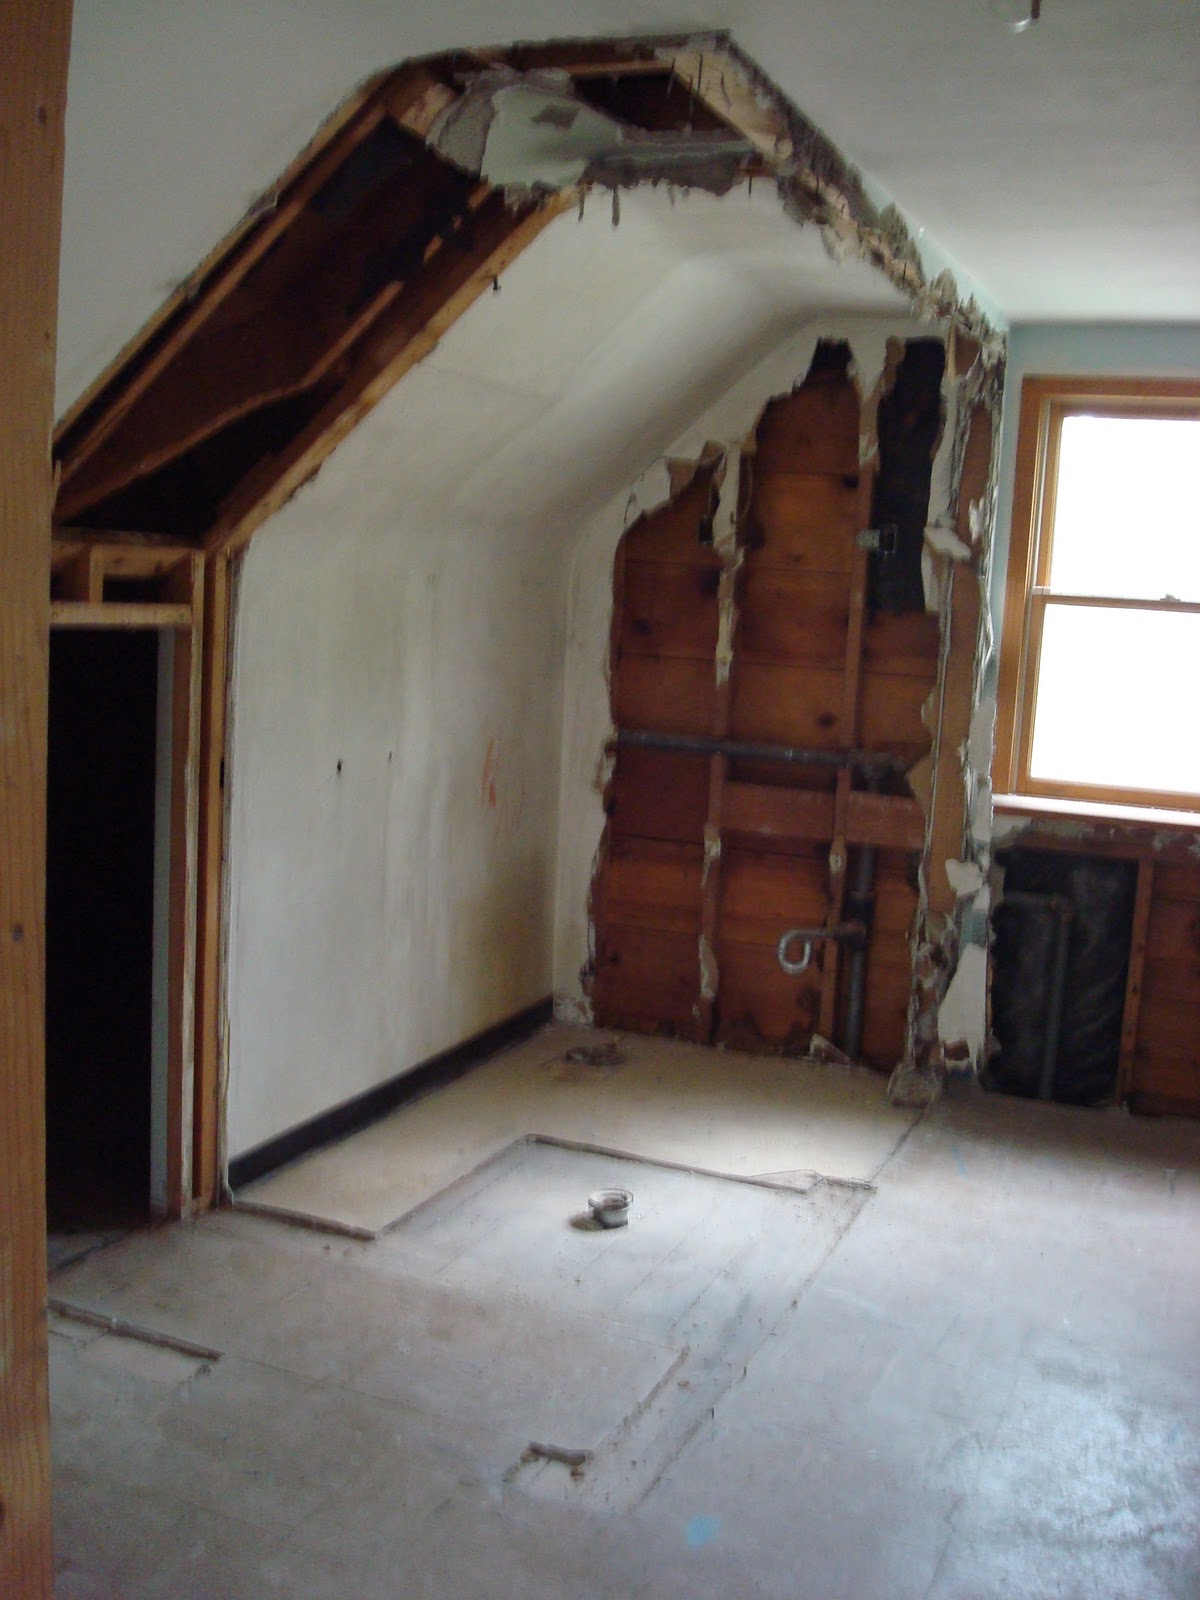
Madison's Room
(my daughter)

This is what the room looked like the first time
we walked thru the house!

This was the room the day we purchased it!

Looking to the left in the opened door, in the back, was...

... a very tiny, scary bathroom.
And the door closest to the entry held a closet.
But it was what we found in the closet that
was the true gem...

A secret room!
And the dead raccoon!
We quickly removed the old bathroom and
closet and the raccoon.

Exposing the entrance to the secret room.

Our contractors framed a new entrance
to this room, creating a new closet
and hang out place for Madison!

We then added a window allowing
for light!
We removed all the walls and ceilings in this room.

The door to her room was moved a little to the left
allowing for the wall in Zac's room.

Drywall goes up!

Room gets new trim
and a paint job!
Oatmeal and Purple!
(Madison's choice)

Even the closet gets a purple wall!

Carpet!
(sorry for the bad photo)

New door to the closet!

Carpet in the closet!
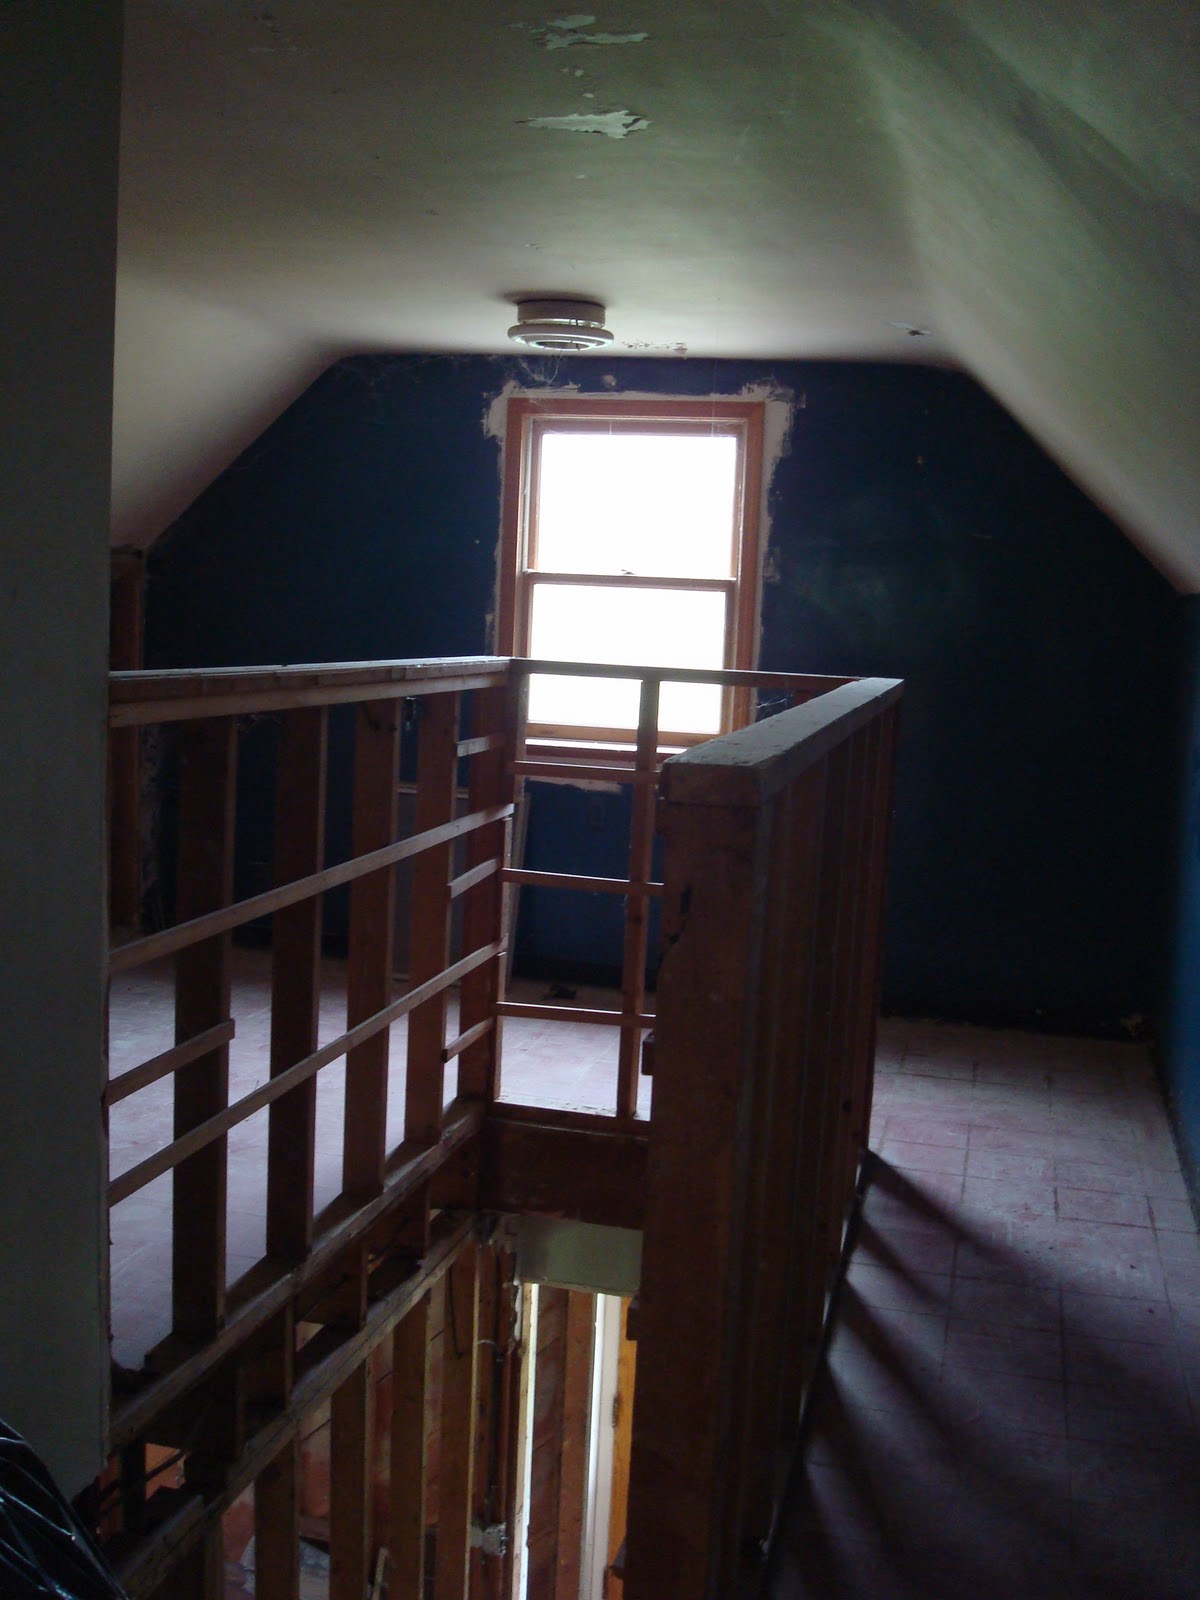
The Hang Out Hall
and Staircase

When I first saw this dormer....
it screamed at me
" Window seat!"

To the left of this was the original landing
and a hall leading to a small open space which would
become the new bathroom.

The stairs were wrapped
by a plywood half wall.
We removed the plywood in order to prepare
the steps to be reversed.

Looking back from the end of the hall towards
Madison's room!

Once the stairs were reversed
it was time to build a new banister.
(We will put that toilet anywhere!)

Wayne and I worked at setting the newel posts
and setting the balusters!

The finished banister!
Minus the awful blue wall!

From the other direction.
We added trim work to the hall.
Remember the window bench idea?

Wayne built one!

Using the left over wood from the trim,
Wayne created the backing to the shelf!
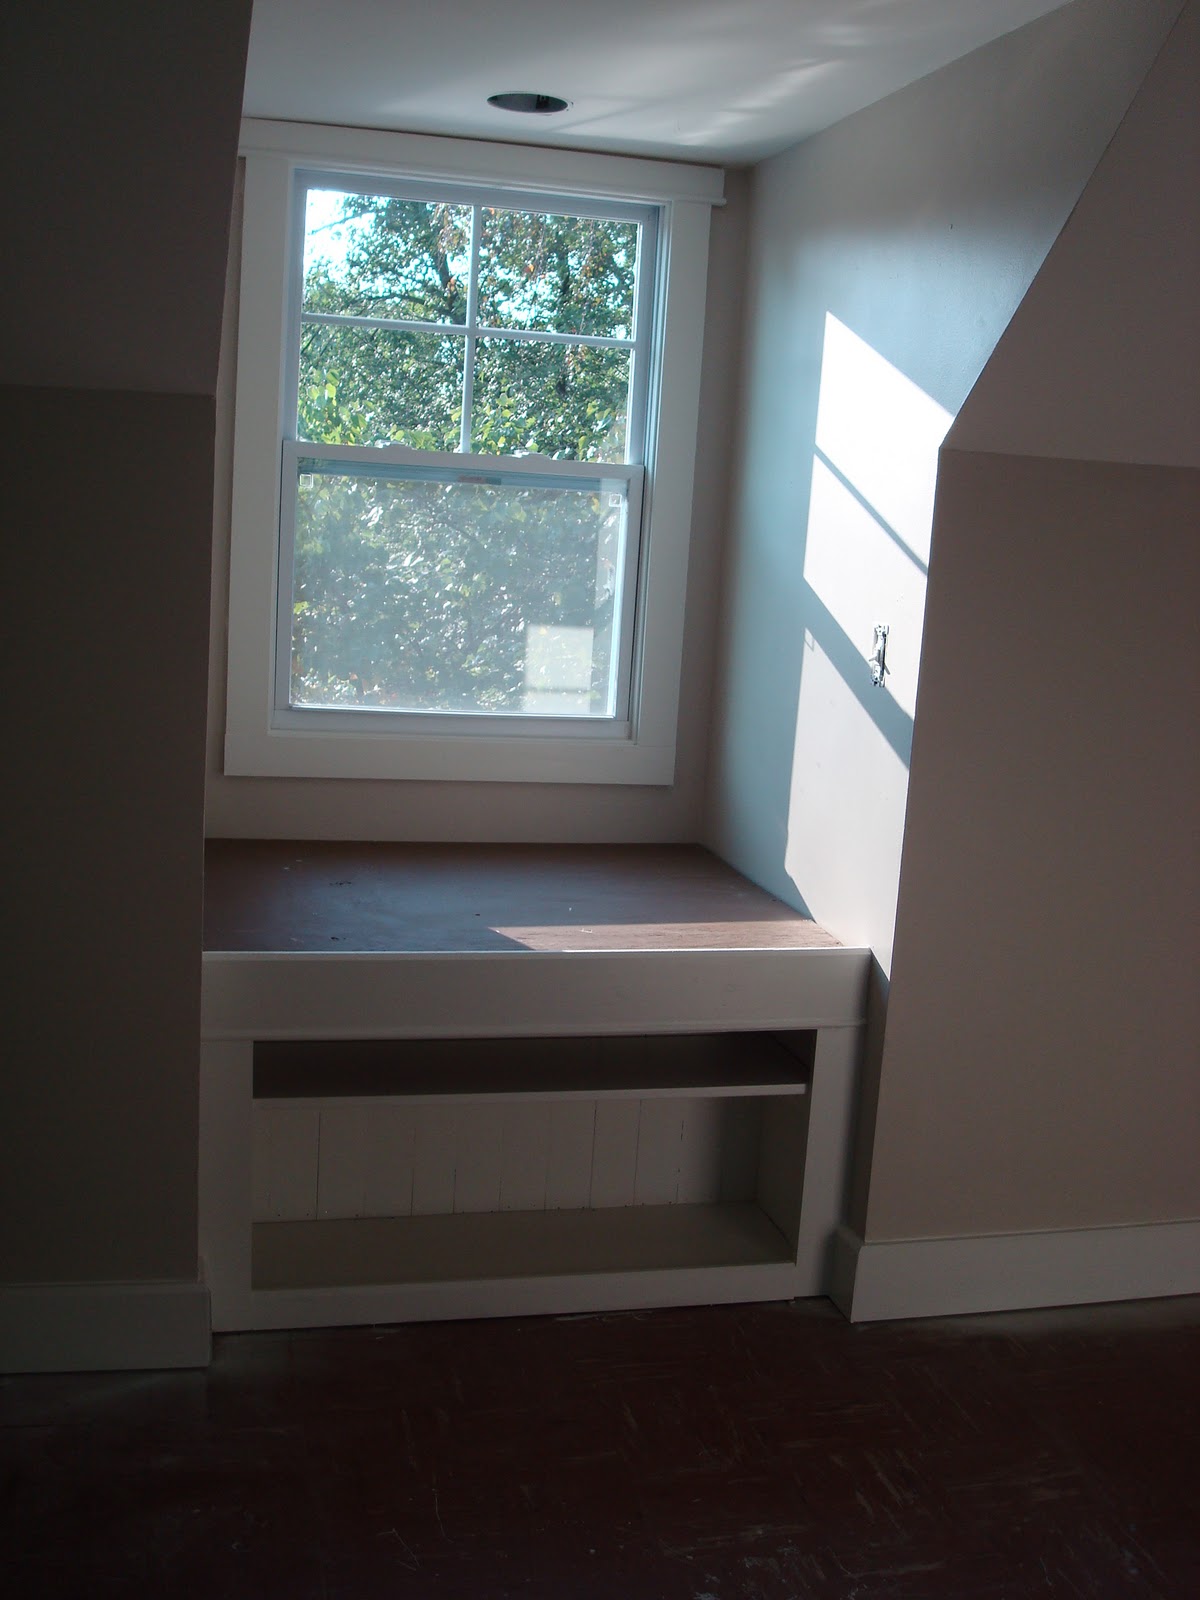
All done!

Ready for carpet.

And in the end...

We have carpet and a finished room!

Madison has already claimed the window seat!

This landing will be the hangout room for the kids.
The wires coming out of the wall on the left
are for a small wall mounted TV.
The Bathroom

This is the small room that was slated
for the new bathroom.

We removed the knee wall and

side wall next to the chimney.

Added a full wall between the stairs and an
opening for the door by the window.

Next we built out a shower with a large bench.
Kids decided against a bathtub.

Wayne and I used subway style
tile with a slate look on the walls
for the shower
and the same tile in a square on the floor.

The door still needs to be installed!
Well, that is the upstairs!
Coming soon.....
the first floor!